
Boosting Retail & Wholesale Sales with Business Promotions in Odoo
Odoo facilitates the sales promotions in Sales, Website(e-commerce) and POS modules. In order to attract customers to sales promotions helps...


𝗢𝗿𝗴𝗮𝗻𝗶𝘇𝗶𝗻𝗴 𝗥𝗲𝘀𝘁𝗮𝘂𝗿𝗮𝗻𝘁 𝗢𝗿𝗱𝗲𝗿𝘀 𝗶𝗻𝘁𝗼 𝗖𝗼𝘂𝗿𝘀𝗲𝘀 𝗶𝗻 𝗢𝗱𝗼𝗼
A Smart Way to Streamline Service
Running a restaurant is all about timing—getting appetizers, main courses, and desserts to the table in perfect sequence. If you’re using Odoo’s Point of Sale (POS) system, you’re already on the right track to streamline operations.
𝗪𝗵𝘆 𝗢𝗿𝗴𝗮𝗻𝗶𝘇𝗲 𝗢𝗿𝗱𝗲𝗿𝘀 𝗶𝗻𝘁𝗼 𝗖𝗼𝘂𝗿𝘀𝗲𝘀 𝗶𝗻 𝗢𝗱𝗼𝗼?
Efficient order management is key to keeping your restaurant humming. By organizing orders into courses—appetizers, mains, desserts, and more — you can:
Odoo’s restaurant POS features make this possible without complex workarounds. Let’s dive into how you can optimize your setup for multi-course dining.
To get started, ensure your Odoo POS is configured for restaurant use:
This unlocks tools like table management and kitchen order routing—perfect for managing courses effectively.

In Odoo, product categories are your secret weapon for course organization:
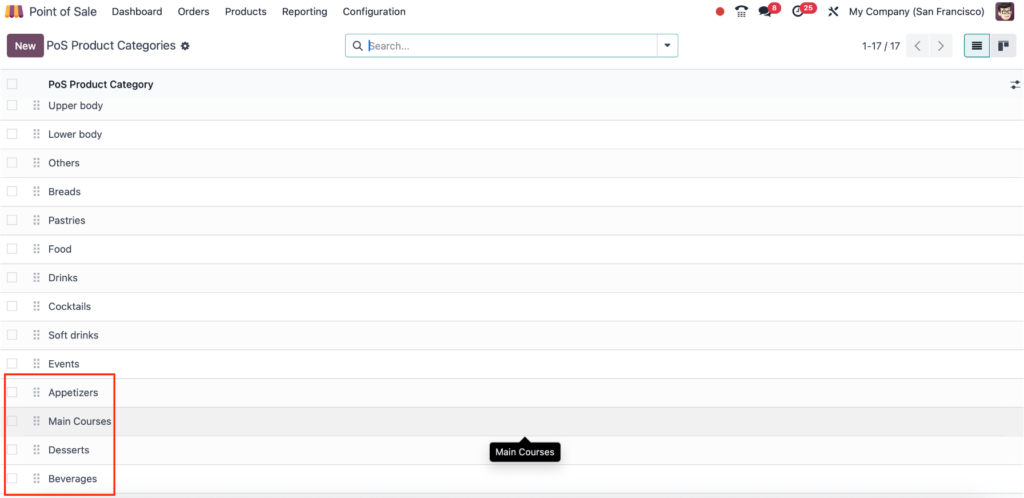
For example, assign “Bruschetta” to “Appetizers” and “Grilled Salmon” to “Main Courses.” This setup helps staff and kitchen teams identify courses at a glance.
To send orders to the kitchen in stages:
𝗣𝗿𝗼 𝗧𝗶𝗽: Send appetizers first, then mains later, to control the pace of service.
Here’s how to handle a multi-course order:
You can send courses incrementally—appetizers now, mains later—ensuring perfect timing.

Odoo’s POS lets you revisit a table’s order anytime:
Imagine a table orders:
The kitchen gets clear, staged instructions, and your guests enjoy a perfectly timed meal.

𝗪𝗵𝘆 𝗢𝗱𝗼𝗼 𝗶𝘀 𝗣𝗲𝗿𝗳𝗲𝗰𝘁 𝗳𝗼𝗿 𝗠𝘂𝗹𝘁𝗶-𝗖𝗼𝘂𝗿𝘀𝗲 𝗥𝗲𝘀𝘁𝗮𝘂𝗿𝗮𝗻𝘁𝘀?
Odoo’s flexibility makes it a top choice for restaurants needing robust order management. Whether you’re a small bistro or a fine-dining establishment, organizing orders into courses in Odoo saves time, reduces errors, and keeps customers happy.
Odoo facilitates the sales promotions in Sales, Website(e-commerce) and POS modules. In order to attract customers to sales promotions helps...
Landed cost refers to the total cost of acquiring a product from a vendor and getting it delivered to its...
With the 𝗢𝗱𝗼𝗼’𝘀 𝗦𝘂𝗿𝘃𝗲𝘆 module, you can seamlessly deploy tailored questionnaires, certifications, and live assessments directly within your existing ERP...
Let’s bring your vision to life! Get in touch with us today.
+91 871 483 1222